Great news! Now everybody can browse SoundGrid shared Grids and listen to them right in web browser! No iDevice required.
Just navigate to http://www.mifki.com/soundgrid/index.html#sg. Sortable by date or user rating. Only Grids created in Song Mode are available.
Note: encoding process is taking place now, not all grids are available on the site yet, be patient.
 Actually besides the new design there are not so many changes. One of them is possibility to export recorded tracks in uncompressed WAV format (previously only AAC compressed files could be exported).
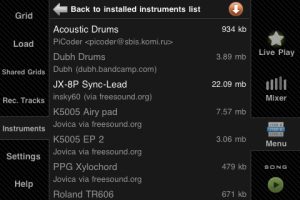
 List of additional downloadable instruments now has special button to automatically download all missing instruments for the current project.
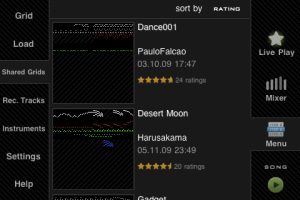
 Sort by rating in Shared Grids now works better taking into account number of ratings too.
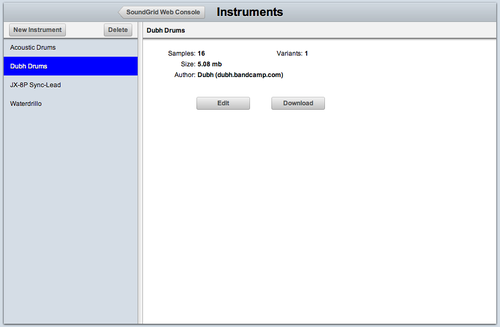
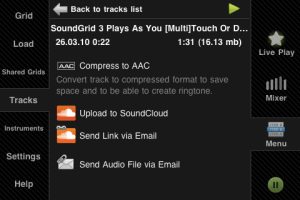
 And finally most awaited new feature in this version in Web Console. It currently has three functions. First, it allows users to send crash reports in case of application crash. This will help me to diagnose and fix problem.
Second, it’s possible to download recorded tracks from Web Console. This is especially useful for downloading uncomressed WAV files because it’s usually not possible to send so large files via email.
And lastly (and actually what it was created for), Web Console allows you to manage instruments, including uploading of your own samples to create new instruments.
And finally most awaited new feature in this version in Web Console. It currently has three functions. First, it allows users to send crash reports in case of application crash. This will help me to diagnose and fix problem.
Second, it’s possible to download recorded tracks from Web Console. This is especially useful for downloading uncomressed WAV files because it’s usually not possible to send so large files via email.
And lastly (and actually what it was created for), Web Console allows you to manage instruments, including uploading of your own samples to create new instruments.
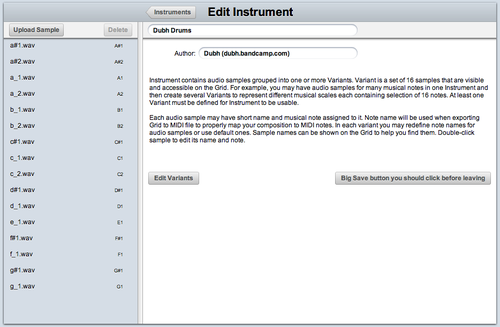
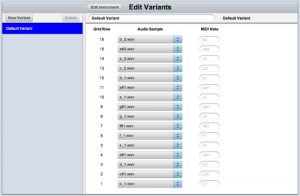
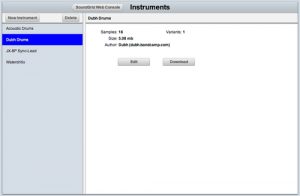 Not so much to comment here. You can upload your samples to newly created instrument (uploading of many files at once in ZIP archive is supported), specify MIDI note name and/or sample name…
 …And then assign these samples to grid rows.
 Now creation of new instruments is very easy. If you want your instrument to be publicly available, click Download button and then send me archived instrument.
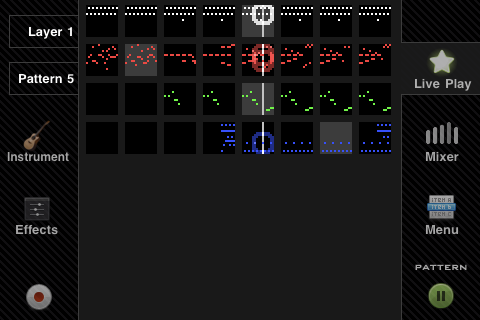
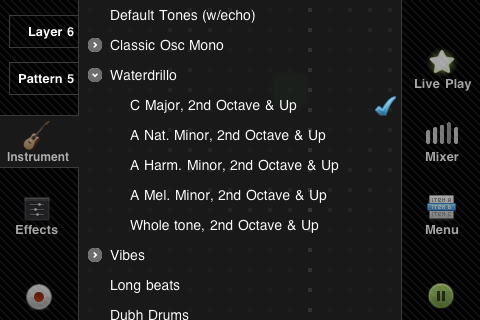
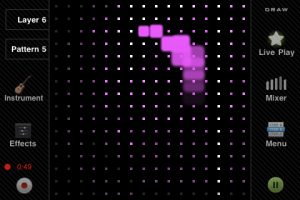
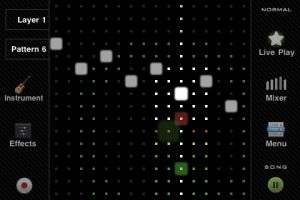 Middle part of the screen is occupied by the matrix itself (not surprising) and on both sides from it various buttons are located, most of which show additional panels instead of the matrix in the middle part. No need to explain Play/Pause/Record buttons so lets move to others. On the left side there are buttons for switching current layer and pattern, and for showing panels related to current layer. On the right buttons related to entire project or system are located.
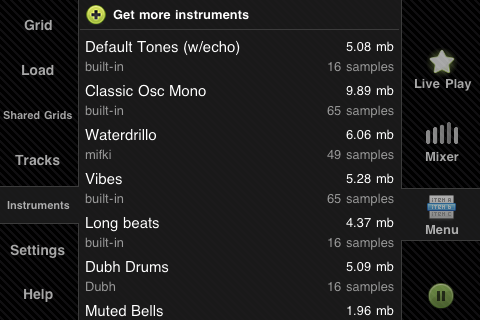
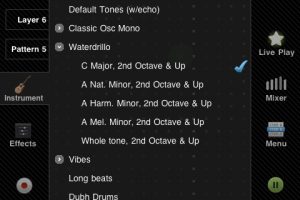
Following image shows Instrument Selector panel overlaid over the grid.
Middle part of the screen is occupied by the matrix itself (not surprising) and on both sides from it various buttons are located, most of which show additional panels instead of the matrix in the middle part. No need to explain Play/Pause/Record buttons so lets move to others. On the left side there are buttons for switching current layer and pattern, and for showing panels related to current layer. On the right buttons related to entire project or system are located.
Following image shows Instrument Selector panel overlaid over the grid.
 These buttons are smart - if you touch them briefly, panel will show and stay but if you hold them longer it will close when you release it. So you can quickly activate panel with one hand, make changes with another and it will automatically hide when you remove finger from the button.
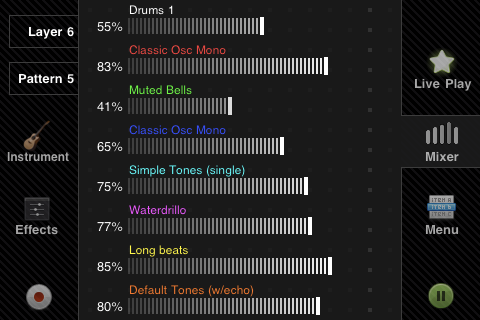
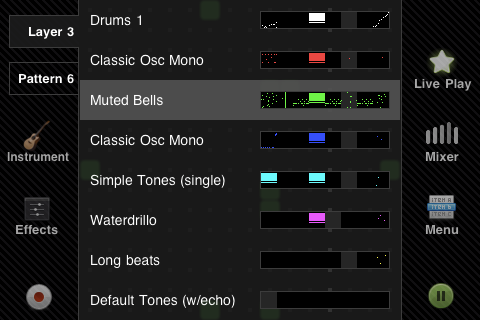
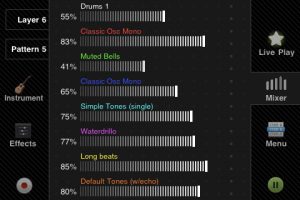
Next new thing is the Mixer panel. It allows you to see levels for all layers at once and change any of them (multitouch supported).
These buttons are smart - if you touch them briefly, panel will show and stay but if you hold them longer it will close when you release it. So you can quickly activate panel with one hand, make changes with another and it will automatically hide when you remove finger from the button.
Next new thing is the Mixer panel. It allows you to see levels for all layers at once and change any of them (multitouch supported).
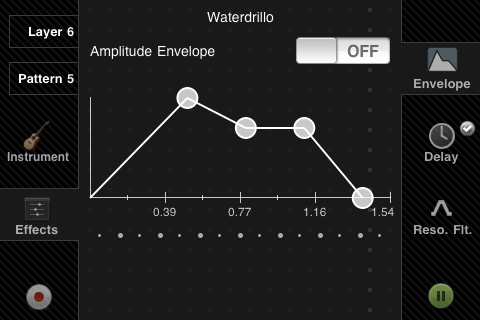
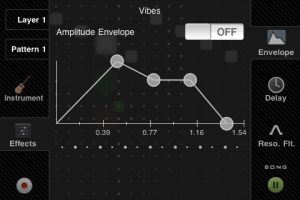
 Next, Amplitude Envelope control.
 You see, some panels may have different modes of operation switchable by buttons located on the opposite side from the panel activation button, controls themselves are always located in the middle part of the screen. Play button always stays on top so you can stop/resume at any time. I hope you will like these interface changes!
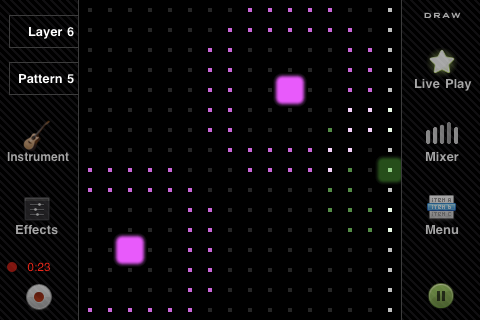
By the way, on the above picture there’s current sequencer mode indicator just above Pause button. Modes now switched by touching and holding Play/Pause button.
In addition to sequencer modes there are now two used input modes - usual Normal Mode and Draw Mode in which notes will play as you touch the matrix or draw over it, of course multitouch is supported too. Current mode indicator/switch is located in top-right corner of the screen.
You see, some panels may have different modes of operation switchable by buttons located on the opposite side from the panel activation button, controls themselves are always located in the middle part of the screen. Play button always stays on top so you can stop/resume at any time. I hope you will like these interface changes!
By the way, on the above picture there’s current sequencer mode indicator just above Pause button. Modes now switched by touching and holding Play/Pause button.
In addition to sequencer modes there are now two used input modes - usual Normal Mode and Draw Mode in which notes will play as you touch the matrix or draw over it, of course multitouch is supported too. Current mode indicator/switch is located in top-right corner of the screen.

 Normal mode slightly upgraded too, now if you touch the matrix briefly, note will play; touch hold longer to activate note (this can be switched off in settings). If you touch and move slightly over the grid (preventing note activation), translucent hint with note/sample names will slide from the left to help you find the one you need.
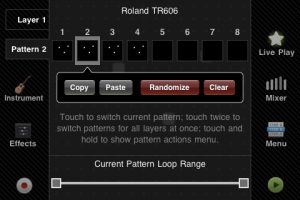
 Next, new pattern menu with clear and randomize pattern buttons and new function - copy/paste pattern between layers or projects.
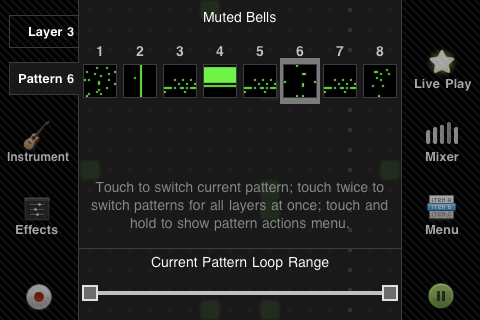
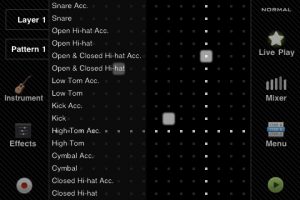
 One more completely new mode of operations - Live Play mode.
 It gives you overview of all layers and patterns on the one screen and allows to quickly switch pattern for any layer. If you touch any pattern, it will be activated, if you touch twice, the same pattern (by number of course) will be activate for all layers. But if you touch and hold longer, pattern will be queued and activated after the current one! I hope this mode will make live performances and recording much more comfortable.
That’s all for now, in the
It gives you overview of all layers and patterns on the one screen and allows to quickly switch pattern for any layer. If you touch any pattern, it will be activated, if you touch twice, the same pattern (by number of course) will be activate for all layers. But if you touch and hold longer, pattern will be queued and activated after the current one! I hope this mode will make live performances and recording much more comfortable.
That’s all for now, in the